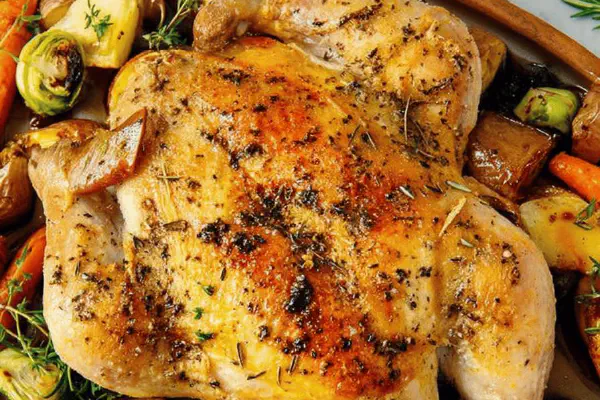
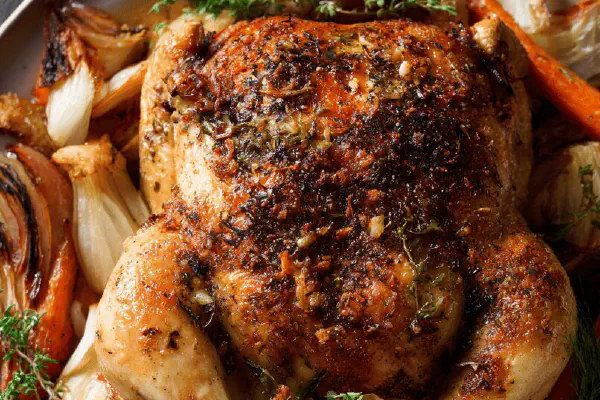
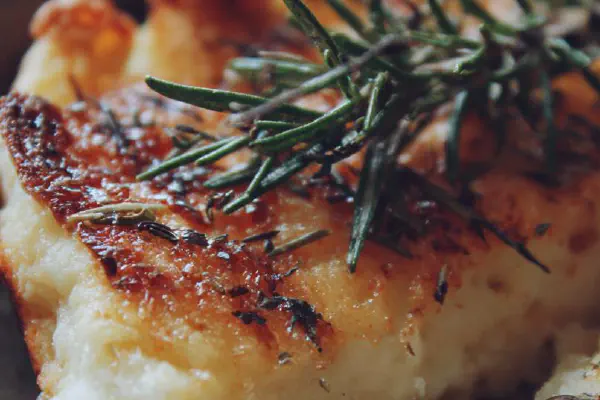
Herbed Spatchcock Chicken
E
By Emma
Certified Culinary Professional
•
Recipe tested & approved
Spatchcock a whole chicken by removing the backbone for faster, more even roasting. Coat with olive oil, fresh thyme and sage, plus roasted garlic for an herby punch. Roast high at first for crispy skin, then lower heat to cook through. Surround with quartered carrots, fingerling and purple potatoes, plus Brussels sprouts tossed in the same herb oil. Watch juices run clear, skin crisp up, veggies caramelize. Rest chicken before carving to lock juices in. Sub sage for rosemary if needed; garlic powder can stand in for fresh minced garlic in a pinch. Keep an instant-read handy but trust the color and feel. Turn veggies gently to avoid breaking. Timing varies with bird size but look for golden, crackling skin and tender roots underneath. A hands-on way to nail roast chicken with veggie sides right on the pan.
Prep:
25 min
Cook:
55 min
Total:
80 min
Servings:
4 servings
#roast chicken
#spatchcock
#one-pan meal
#herb roasted
#easy dinner
#poultry cooking
#vegetables roasting
Before You Start
Bones cracking, garlic sizzling. Hands working fast, feeling the backbone, deciding where to snip. Flattening the bird not just for show but for even heat. That burst of 480°F oven heat, skin begging to turn golden and crisp. Then reducing temp, while vegetables soak up herb oils, roasting through, caramelizing just right. Juices pooling, bubbling under chicken’s skin. Resting so each cut bursts with moisture. Sage replacing rosemary, just because I learned it works better with garlic here. Chunky carrots, fingerlings, and Brussels spots surrounding the bird—roasting together. Smells wafting through the kitchen; impatient fingers poking for doneness. It’s kitchen theatre, not a strict timetable. Smell, sight, and that telling touch. That’s how it should be.
Ingredients
- 3-4 pound whole chicken
- 6 tablespoons extra virgin olive oil
- 4 sprigs fresh thyme leaves
- 3 sprigs fresh sage leaves instead of rosemary
- 5-6 cloves garlic finely minced or pressed
- 1/4 pound purple potatoes quartered
- 1/4 pound fingerling potatoes quartered
- 1/4 pound Brussels sprouts halved
- 4 medium carrots halved lengthwise then quartered crosswise
- Kosher salt
- Fresh ground black pepper
- Optional whole herb sprigs (thyme or sage) for roasting pan
In The Same Category · Main Dishes
Explore all →
Sausage Shrimp Jambalaya
Sweet Potato Quinoa Pie
Steamed Asian Salmon Twist

Roasted Carrots Lentil Couscous

Chunky Veg Chili
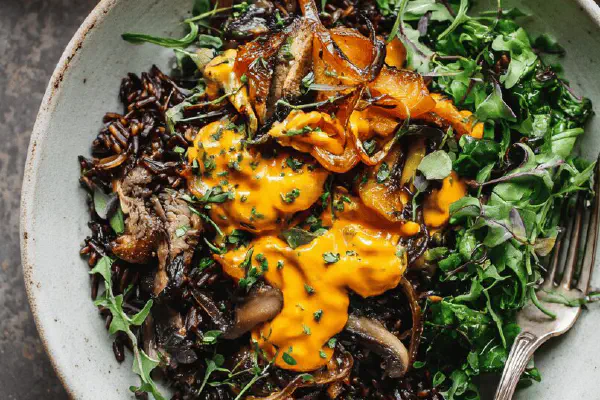
Wild Rice Squash Duck Bowls
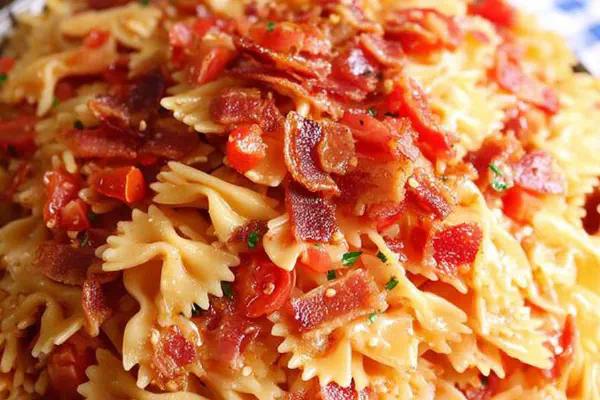
Tomato Bacon Pasta

Savory Basil Tomato Pie
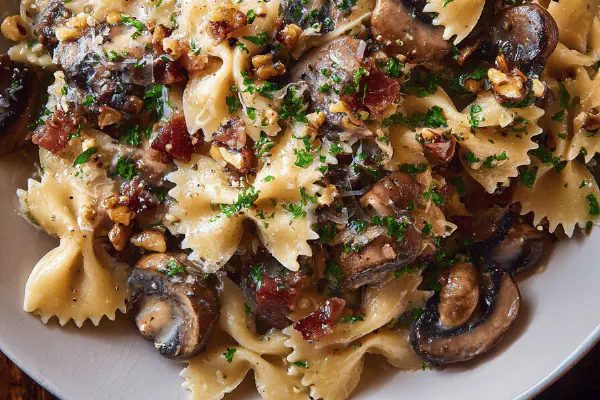
Farfalle with Mushrooms and Crispy Pancetta
White Wine Thyme Roast Chicken
Baked Spaghetti Sauce Twist
Spiced Trout and Beet Salad

Tortilla Quiche Airfryer

Chicken with Creamy Pan Sauce

Potato Veggie Ratatouille
Mini Meatloaf Cupcakes
Asian Style Sirloin BBQ

Twisted Beef Enchiladas

Maple-Glazed Pork Medallions

Simplest Beef Lasagna
About the ingredients
The key to worth-it roast chicken starts with dry skin—pat it, don’t skip it. Removing backbone lets bird lie flat which means crisp skin and even cooking—don’t skip the pressing step or you’ll get an uneven bird. If fresh rosemary is off the table, sage works and brings a herby depth that stands up to garlic well. Garlic loves to roast whole but minced releases flavor quicker—choose depending on your patience. Carrots and potatoes should be uniform pieces so they finish at the same time. Too big, veggies lag behind; too small, turn to mush. When oiling veggies, a gentle toss prevents bruising and soggy spots. You want the oil and herbs coating evenly without damaging the flesh. Kosher salt gives a clean salty punch without overdoing it; fine salt here risks oversalting. Veggies can tolerate less salt because they absorb flavors while roasting, so keep it moderate.
Method
Spatchcock the Chicken
- Start by removing any giblets and trimming excess skin especially around the neck. Look for loose flaps that will burn if left on. Pat dry thoroughly with paper towels; moisture kills crisp skin. Lay chicken breast side down, legs facing you on a stable cutting board.
- Use your finger to trace along the backbone; feel that hard ridge between softer ribs. Identify the spine for cutting.
- Grab chicken shears. Begin snipping at the tail end on the right side of the backbone in firm, long cuts through bone. The bones are thin but dense; brace yourself, slow and deliberate. Repeat on the left side.
- If you don’t have shears, place a sharp chef’s knife just beside the spine and cut down with one forceful motion using the heel of your palm to push through the ribs. Go slowly at first to avoid slipping. Remove the backbone completely—it’s a bit of a wrestling match. Discard or save for stock.
- Flip the bird so breast side up, cavity down. This next move releases tension. Press hard with the heel of your hand on the breastbone until you hear a slight crack; the bird should flatten out fully. Don’t be timid here; this step ensures even cooking.
Roast the Chicken and Veggies
- Preheat oven to 480°F for that initial blast of heat—this gets skin crackling fast. While warming, mix 6 tablespoons olive oil, fresh thyme leaves, sage leaves, and the garlic. Stir well; the raw garlic punches the oil with aroma.
- Drizzle about 2 tablespoons of this mixture over the chicken both sides, rub it in with clean hands. Reserve the rest for the vegetables. Salt the bird generously—Kosher salt is forgiving yet effective—and dot with black pepper. This seasoning method makes the flavors punch through the skin.
- Prep veggies while chicken starts warming. Cut carrots lengthwise in half, then crosswise into quarters. Same size for fingerling and purple potatoes helps everything cook evenly. Toss veggies in remaining herb-garlic oil in a bowl using a wooden spoon or silicone spatula gently—don’t bruise too hard.
- Spread the veggies around the chicken on the rimmed baking sheet. Scatter any leftover garlic cloves over veggies. Salt and season the vegetables sparingly; herbs on top add aroma but skip if you want a crispier roast surface.
- Put pan in oven. Roast for 15 minutes at 480°F. You’ll hear sizzling and start to see skin browning at edges; this is critical. Lower oven to 395°F and continue roasting for 35-40 minutes. Start looking for juices running clear when you poke near the thigh and an internal temp near 160°F. Don’t rely only on time—sensorial checks win here.
- Every 10 minutes, check veggies. Gently turn with tongs or spatula to avoid tearing. They should develop some golden edges but not fall apart into mush.
- Once chicken is done, rest it tented loosely with foil for 10 minutes. This step seals juices back into meat or risk drying. Vegetables will continue to soften slightly under the chicken’s warmth during resting.
- If no fresh rosemary on hand, sage is a great substitute—earthier, less piney. Garlic powder can replace fresh cloves, but fresh garlic caramelizes better and lends a sweeter note. If you lack shears, use a sharp, sturdy knife carefully. Watch your fingers.
- The cracking noise when flattening the chicken? Essential. If it won’t crack, your bird is cold or very tough; warm slightly or press harder. Keep the skin dry—any wetness makes for steamed, soggy skin instead of that crisp snap.
- Serve right from the pan. The roasted herbs smell outlandish. Carrots should yield tender bite, potatoes fluffy inside with faint crust. Chicken skin crisp, meat juicy, herbs in every tender bite.
- Cleanup tip: soak the pan immediately to prevent stuck roasted bits from becoming a nightmare to scrub. Done correctly, the roasting pan will have treasure trove drippings perfect for gravy or sauce.
- In case the skin is stubbornly soft after roasting, pop under broiler for 2-3 minutes but watch like a hawk. Caramelization should be a deep golden brown, not blackened.
- Chicken spatchcocking speeds cooking, helps even browning, and easy to carve once rested. Plus, roasting veggies at the same time means fewer dishes and better mingled flavors. All in one shot. Fancy dinner? Nailed.
Cooking tips
Start by removing things you don’t want—giblets, loose fat—that’ll ruin skin crisping. Dry chicken thoroughly. Use the backbone as a roadmap; running fingers along it first prevents miscuts. Shears make life easier, but a sharp knife with a firm hand works fine; patience key. Press down on the breastbone firmly until you feel or hear a slight crack—that’s bird flattening; don’t be shy or you’ll have an uneven bird and longer cook. The initial high temp heat creates immediate skin blistering and crackle; essential for texture and visual appeal. Don’t ignore smell and sounds—sizzle intensity fades means oven might be low or bird steaming instead of roasting. Lowering temp after 15 minutes finishes cooking through without burning. Turning vegetables periodically serves two purposes—avoids burning one spot and encourages browning all over. Check tenderness by piercing veggies, not just sticking to times. Juices running clear is your best indicator of done chicken, then temp confirmation nearby 160°F in thickest part. Resting is not optional—essential to redistribute juices or you’ll lose all moisture when carving. Use leftovers for soup or extremely lazy lunches.
Chef's notes
- 💡 Bone crack sound means flattened bird. No crack? Bird cold or thick breast. Warm slightly; press firm on breastbone until distinct snap. Don’t hesitate. Flat chicken cooks evenly, skin crisps up evenly. Pat skin dry like mad. Moisture steals crispness fast. Keep towels handy; press under flap areas too.
- 💡 High heat blast of 480F starts skin blistering immediately. Don’t skip this stage. Fifteen minutes enough to brown edges then drop temp to 395F. Constant skin check—browning edges first hint. Juices clear near thigh signals almost done but internal temp near 160F has final say, never eyeball alone.
- 💡 Veggie uniformity matters. Carrots split lengthwise then quartered across. Potatoes cut similar size, quartered. Smaller means mush faster. Bigger means crunchy roots lagging. Toss gently in reserved herb-garlic oil. Avoid bruising or smashing flesh. Herbs give aroma but salt veggies lightly or skin won’t crisp well.
- 💡 No fresh rosemary? Sage’s earthiness works better with roasted garlic’s sweet smell here. Garlic powder can back up fresh cloves. But fresh garlic caramelizes giving sweeter, deeper aroma. Use entire sprigs in roasting pan for subtle aroma release. Toss leftover smashed garlic with veggies for surprise bursts.
- 💡 Knife instead of shears? Perfectly doable. Careful deep cuts beside spine with chef’s knife heel pressure. Slow but steady. No slipping or rushing. Keep finger positioning safe. Backbone removal crucial for flat lay; can scrap for stock later. Don’t skip trimming loose skin around neck and flaps. Those burn sharp quickly.
Common questions
How to know when chicken is done?
Skin crackling golden first sign. Juices clear when poked near thigh—not pink. Temp near 160F thickest part. Don’t rely only on time. Feel meat firmness too. Juicy but not soft. Wait with rest before carving.
Can I use rosemary instead of sage?
Definitely yes. Sage more earthy, savory with garlic though. Rosemary sharper piney flavor. Use whatever herb suits your taste. Leaves whole or chopped fine, both work. Sprinkle with herbs on vegetables or just under skin too.
What if skin won’t crisp?
Often skin damp or bird cold. Dry skin thoroughly. Pat skin before oil. Oven temp too low might steam rather than roast; blast 480F first. Press on breast so chicken lies flat—uneven cooking messes skin texture. Last resort broiler for few minutes but watch closely.
How to store leftovers?
Cool completely before refrigerating loosely covered. Use airtight container if possible, but don’t trap moisture. Reheat in oven to crisp skin again or stir-fry shredded meat into other dishes. Freeze bones with some meat for stock. Veggies lose crispness but still tasty cold or reheated.
You’ll Love These Too
Explore all →
Beef Mushroom Noodles

Brookie Stack Cookies
Roasted Parsnip Onion Soup

Layered Cookie Brownies

Crunchy Coconut Macaroons

Savory Corn Herb Oil

Zesty Lime Fudge
Savory Herb Chicken Thighs

Buffalo Chicken Stuffed Peppers

Savory Chicken Cheese Sphere

Strawberry White Chocolate Bites
Braised Pork Shoulder Orange Cinnamon

Chunky Fiery Salsa

Twisted Court-Bouillon
Spicy Ranch Firecrackers

Bubba Breakfast Burger

Spicy Shrimp Ramen Stir

Crunchy Oat Biscuits

Light Caesar Salad Twist

Almond Joy Bars Remix
