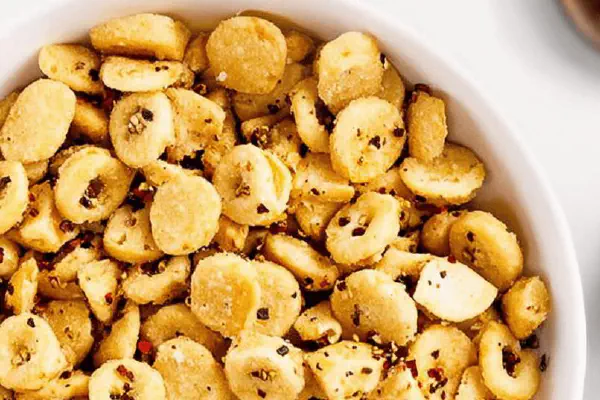
Canned Biscuit Pretzel Bites

By Emma
Certified Culinary Professional
Ingredients
- 1 can refrigerated biscuits, each cut into 4 pieces
- 2 cups warm water
- 2 tablespoons baking soda
- 3 tablespoons melted butter
- 1 teaspoon coarse sea salt
- 1 teaspoon honey (swap for sugar - adds subtle sweetness)
About the ingredients
Method
- Warm the oven to 430F and line a baking sheet with parchment paper or a silicone mat.
- Cut each biscuit roll into four portions. Roll each piece gently into tight balls. Don't overwork the dough or it gets tough.
- Make a shallow cut or slit on top of each ball – this helps steam escape and prevents bursting or dough ruptures.
- Mix warm water in a bowl and stir baking soda until fully dissolved. It will fizz slightly but settle fast.
- Drop each dough ball in this alkaline bath one by one. Let them soak briefly to get pretzel crust developing on the surface.
- Using a slotted spoon, lift out dough balls, let excess drip then arrange on the baking sheet with slit side up.
- Brush each ball generously with melted butter for browning and flavor. Immediately sprinkle flaky salt over the wet surface.
- Bake in the preheated oven for 7 to 10 minutes, watching closely for a deep golden to deep amber color developing. Edges get firm and snappy.
- Pull them out as soon as the tops have good color and bottoms feel firm if you lift one slightly. Too long: dry and hard bites.
- Serve immediately. If making ahead, reheat gently in a hot oven wrapped in foil to refresh the crust.
Cooking tips
Chef's notes
- 💡 Cut dough into equal pieces- eyeball or weigh. Too big = soft blob no crisp edges. Roll gently- overworked dough turns tough. Slits must vent steam. Not deep enough? Surprise blowouts. Too deep? Dough falls flat. Balance is key. Slotted spoon when pulling from soda bath- let excess drip off. This controls crust thickness.
- 💡 Baking soda bath not optional- alkaline water triggers Maillard reaction fast, crust becomes chewy, shiny. Water warm, not hot- too hot cooks dough surface too early, leads to soggy crust. Mix soda in completely- fizz settles fast. Dip quickly or dough absorbs, splits. Timing is texture control. Skip bath, expect bread bolts.
- 💡 Brush butter right after soda dip- locks salty crunch, browns crust. Melted butter also adds gloss, flavor layer. Olive oil can substitute but changes profile- less salt stick, different sheen. Sprinkle flaky sea salt immediately after butter- salt slides off dry crust. Coarse salt essential- table salt dissolves, no bursts of crunch. Experiment with pepper flakes or smoked salt for variation.
- 💡 Oven hotter than usual- 425 to 430F. Pushes deep amber color rapidly without drying inside. Watch closely- golden edges firm and snappy. Use visual and tactile cues- lift one gently, bottom firm means done. Tops too pale? Keep baking few min more. Too long? Dry, hard. Each oven varies, sensory: listen for crackles, smell toasted dough aroma.
- 💡 Honey swap for sugar alters texture- less crispy crust, softer bite. Adds moisture, good if prepping early. Store bites covered, reheat wrapped in foil to refresh crust crispness. Homemade biscuit dough works but press, don’t knead—tough dough means tough bites. Keep dough balls uniform size- uneven pieces bake unevenly. Crowding pan traps steam—crispy crust suffers. Space them out.
Common questions
Why slit the dough balls?
Steam needs escape route. Without slit—unexpected bursting. Dough ruptures spoil texture. Shallow cuts work best. Too deep? Weak dough, collapse. Prevents oven explosions, controls shape.
Can I skip baking soda bath?
Skip it, you get plain bread bites. No chewy, shiny crust. Baking soda bath crashes surface pH, triggers Maillard reaction way faster. Tried baking powder once—flat flavor, no crust. Hot water with soda is non-negotiable for real pretzel texture.
How to know when bites are done?
Deep amber color tops, firm bottoms indicate doneness. Too pale? Undercooked, no crust. Overbaking dries them out, hard bites. Lift one carefully, check underside firmness. Listen- slight crackle from baking. Smell toasted notes. Oven runs hot or cold? Adjust baking time accordingly.
Best way to store and reheat leftovers?
Cover bites to keep moisture, fridge is fine short term. To reheat, wrap in foil, heat in hot oven to regain crispness. Microwave ruins texture. Making ahead? Honey keeps softness but longer storage softens crust. Crisp again with quick oven blast before serving.


